There is something uniquely satisfying about bringing a vintage car into the modern world without sanding away its soul. A good EV conversion keeps the look, the feel, and the character, but swaps the drivetrain for instant torque, quiet cruising, and far fewer oily surprises on the garage floor.
I spent most of my career diagnosing old-school mechanical problems, and I still love a well-tuned carb as much as the next gearhead. But I have also watched hybrid and EV tech mature into something that is genuinely reliable and surprisingly approachable. If you are considering an electric swap for a classic, this guide will walk you through what you actually need, what it costs, where drop-in kits help, and where they do not.
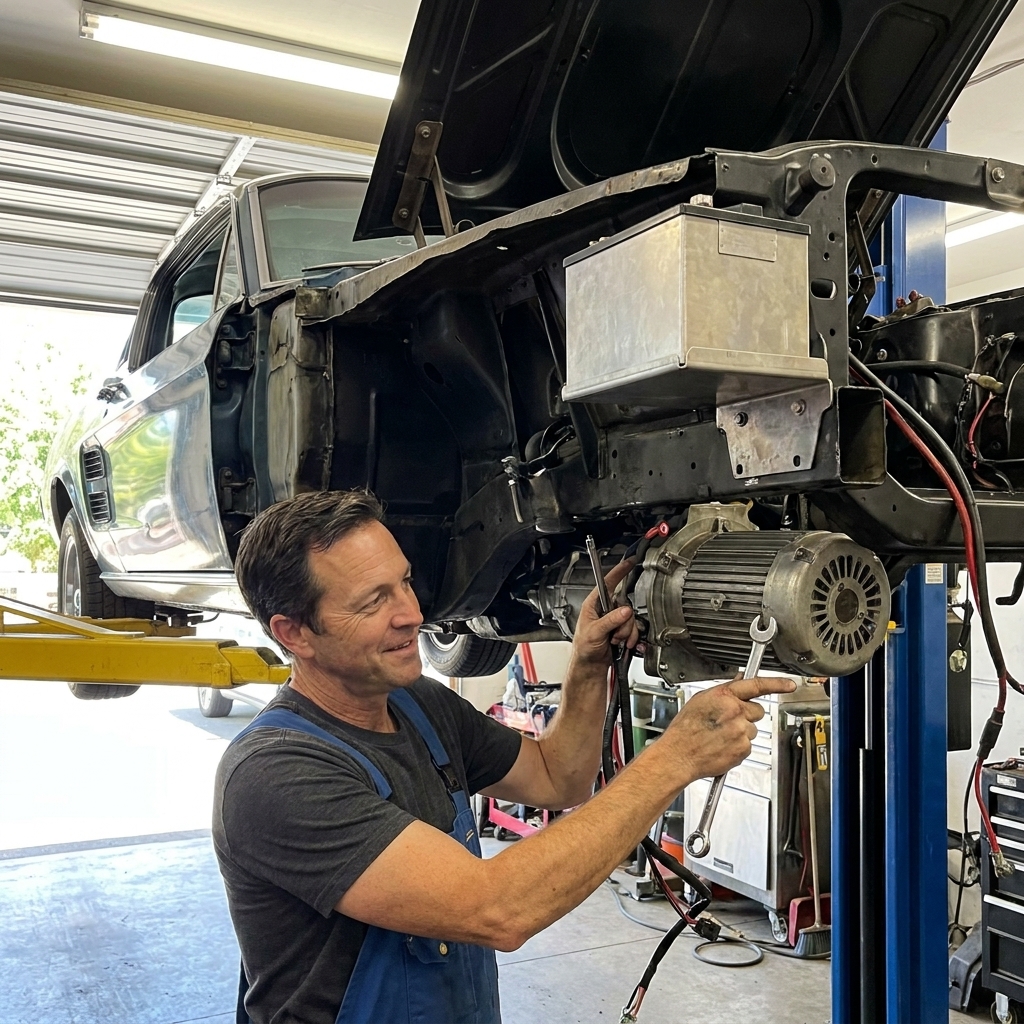
Is an EV conversion right for your classic?
Before you price a battery pack, figure out what you want the car to be. EV conversions land in two broad camps, and your goals determine your parts list and your budget.
Best use cases
- Weekend cruiser or cars and coffee regular: 40 to 120 miles of range is plenty, and you can prioritize simplicity.
- Reliable city driver: You will want good thermal management, strong charging capability, and careful battery placement.
- Performance restomod: Plan for traction upgrades, suspension, and brakes, plus a more powerful motor and inverter.
When I tell people to reconsider
- You want 300+ miles of range without changing the car’s weight or packaging. That is where costs climb fast.
- You need tow capacity or sustained high-speed highway range in a light classic.
- You are not willing to do fabrication or pay a shop that will.
EV conversion cost: real-world budgets
Prices swing wildly because “EV conversion” can mean anything from a simple, lower-voltage runabout to a fully engineered, liquid-cooled, fast-charging restomod. Battery pricing and salvage availability can move these numbers fast, and “turnkey” quotes often do not include the donor vehicle unless the shop spells it out.
DIY parts-focused build: $15,000 to $35,000
This is the sweet spot for a lot of hobbyists using a mix of new and salvaged components. You will do your own wiring, mounts, and troubleshooting. Expect the final result to be great when done carefully, but you earn it.
DIY with a reputable kit foundation: $25,000 to $55,000
A good kit can reduce guesswork and shorten the painful part of the learning curve. You still need labor, tools, and patience, but your compatibility risk goes down.
Professional turnkey conversion: $60,000 to $150,000+
Shops that deliver a clean, fully sorted car typically do custom fabrication, safety validation, tidy harness routing, and thorough testing. If you want OEM-like fit and finish, you pay for it.
Where the money really goes
- Battery pack: Often the single biggest line item.
- Motor and inverter: Power costs, and proven controllers are not cheap.
- Charging hardware: Onboard charger, charge port, DC-DC converter, wiring, contactors.
- Fabrication and mounts: Battery boxes, motor plates, adapter, cooling plumbing.
- Safety and compliance: Fusing, disconnects, BMS, HV cabling, labeling, inspection.
Budget tip from the shop floor: the cleanest conversions are not the ones with the most power. They are the ones with the most time spent on planning, battery packaging, and wiring discipline.
The major components you will need
If you are new to EV architecture, think of it like this: the battery is your fuel tank, the inverter is your “engine computer,” the motor is your engine, and everything else is there to make it safe, drivable, and chargeable.
1) Electric motor
Common choices include modern OEM motors (salvage or crate) and aftermarket AC motors. OEM units can be an incredible value, but they add integration complexity. Aftermarket motors tend to be easier to pair with controllers, at a higher cost per horsepower.
2) Inverter and motor controller
This is the brains and brawn of power delivery. Compatibility matters. Mismatching motor and controller is one of the fastest ways to burn time and money.
3) Battery pack (and battery management system)
Battery chemistry, module shape, cooling needs, and pack voltage all affect range and performance. A proper BMS is non-negotiable for safety and longevity.
4) High-voltage safety hardware
- Contactors and pre-charge circuit
- Main fuse and distribution
- Service disconnect
- Properly rated HV cable and sealed connectors
5) Charging system
- Onboard charger: Determines how quickly you charge on Level 2.
- Charge port: Commonly J1772 for AC charging.
- DC fast charging: Possible on some setups, but it raises complexity significantly and is often skipped due to cost and integration.
6) DC-DC converter and 12V system
Your classic still needs 12V power for lights, wipers, horn, brake lights, and accessories. The DC-DC converter replaces the alternator.
7) Cooling and heating
Some builds are air-cooled and simple. Others need liquid cooling for battery, inverter, and motor. Cabin heat is another decision point. Resistive heaters are straightforward but power-hungry. Heat pumps are efficient but much harder to integrate.
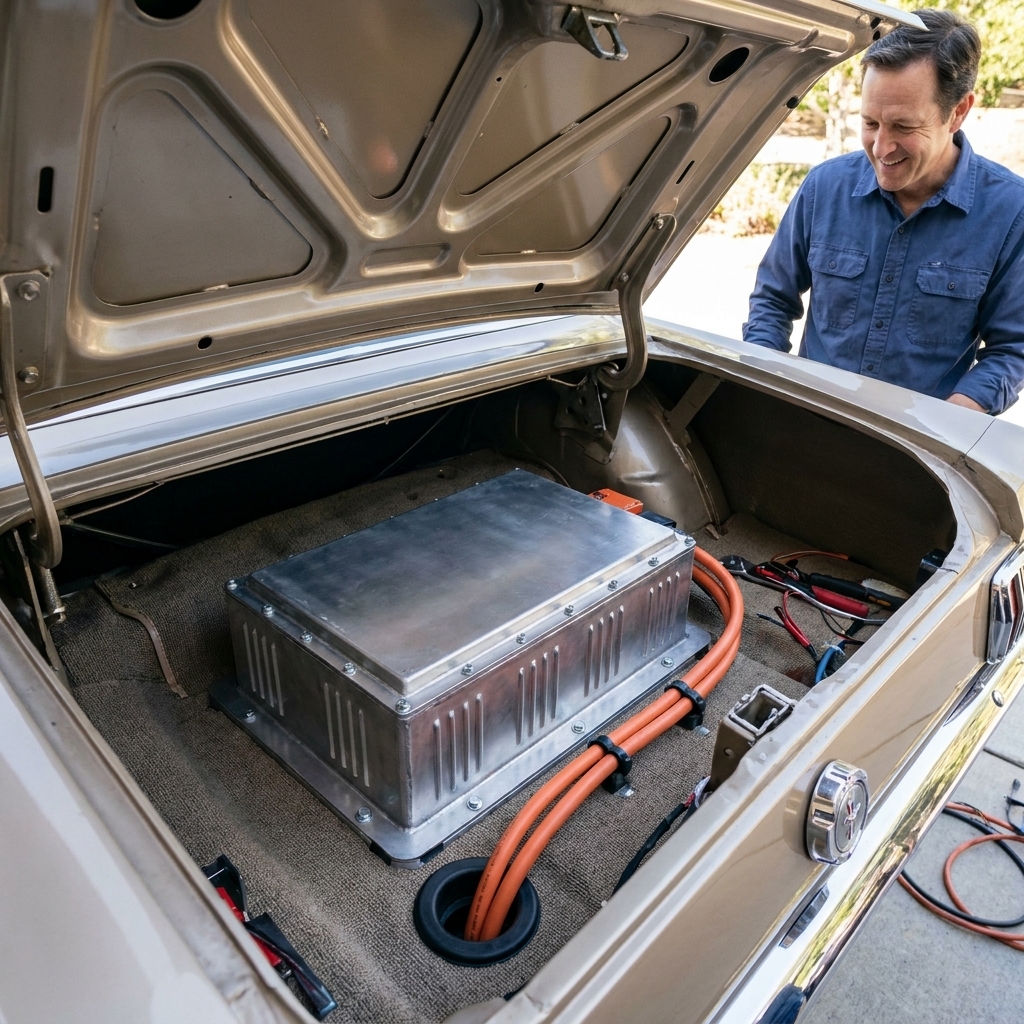
Battery boxes: basics that matter
Battery packaging is not just about fitting modules. It is about keeping them protected, dry, serviceable, and secure in a crash. If you buy a kit, pay attention to what it does and does not solve here.
- Sealing and splash: Aim for weather resistance with good gaskets, proper drain strategy (when needed), and protected cable pass-throughs.
- Venting: Even sealed enclosures need a plan for pressure equalization. Do not trap moisture and do not vent into the cabin.
- Corrosion isolation: Mix steel, aluminum, and road salt without thought and you will build a battery box that dissolves.
- Crush structure and mounting: Bolt to real structure, spread loads, and assume the car will take a hit someday.
- Serviceability: Design access for disconnects, fuses, and BMS connections. Future you will say thank you.
Drop-in kits: what they are and what they are not
“Drop-in” is a little optimistic in the conversion world. A good kit can be close, especially for popular classics, but you are still doing mechanical work, wiring, and verification. Here is how to think about kits without getting burned by marketing.
What a quality kit typically includes
- Motor and controller or inverter package
- Vehicle-specific mounting hardware and adapter solutions
- Throttle pedal solution and basic integration components
- Documentation that actually answers questions
What often is not included (and surprises people)
- Battery modules and battery enclosure fabrication
- Onboard charger and charge port hardware
- Cooling system components
- Power steering and brake vacuum solutions
- Upgraded suspension and brakes
- Labor, tuning, and troubleshooting time
Popular kit approaches you will see
- Crate motor kits: Easier wiring and known support, great for first-timers.
- OEM drive unit “package” kits: Huge performance potential, but integration depends on the quality of the controller solution.
- Vehicle-specific kits: Best fitment, typically priced accordingly, often aimed at common platforms like classic trucks and iconic coupes.
If you are deciding between a kit and a scratch build, ask yourself one honest question: do you want to spend weekends fabricating and debugging, or do you want to spend weekends driving? Both are valid hobbies. Just call it correctly.
Range, performance, and weight
Range
Most classic conversions land between 60 and 150 miles depending on battery size, gearing, vehicle weight, and how aggressively you drive. As a rough anchor, a lot of streetable builds end up in the 20 to 40 kWh range for packaging and budget reasons. Highway speed, tires, alignment, and aero can move your efficiency more than people expect.
Performance
Even a modest setup feels quick because torque is instant and there is no shifting delay. With the right motor and gearing, a classic can be genuinely fast. Just remember: traction, brakes, and suspension were designed for a different era.
Weight and balance
Batteries are heavy. The key is placement. You want the pack low and centered when possible, with robust enclosures and proper crash protection. A poorly placed battery pack can turn a sweet-handling classic into something that feels nervous or overloaded.
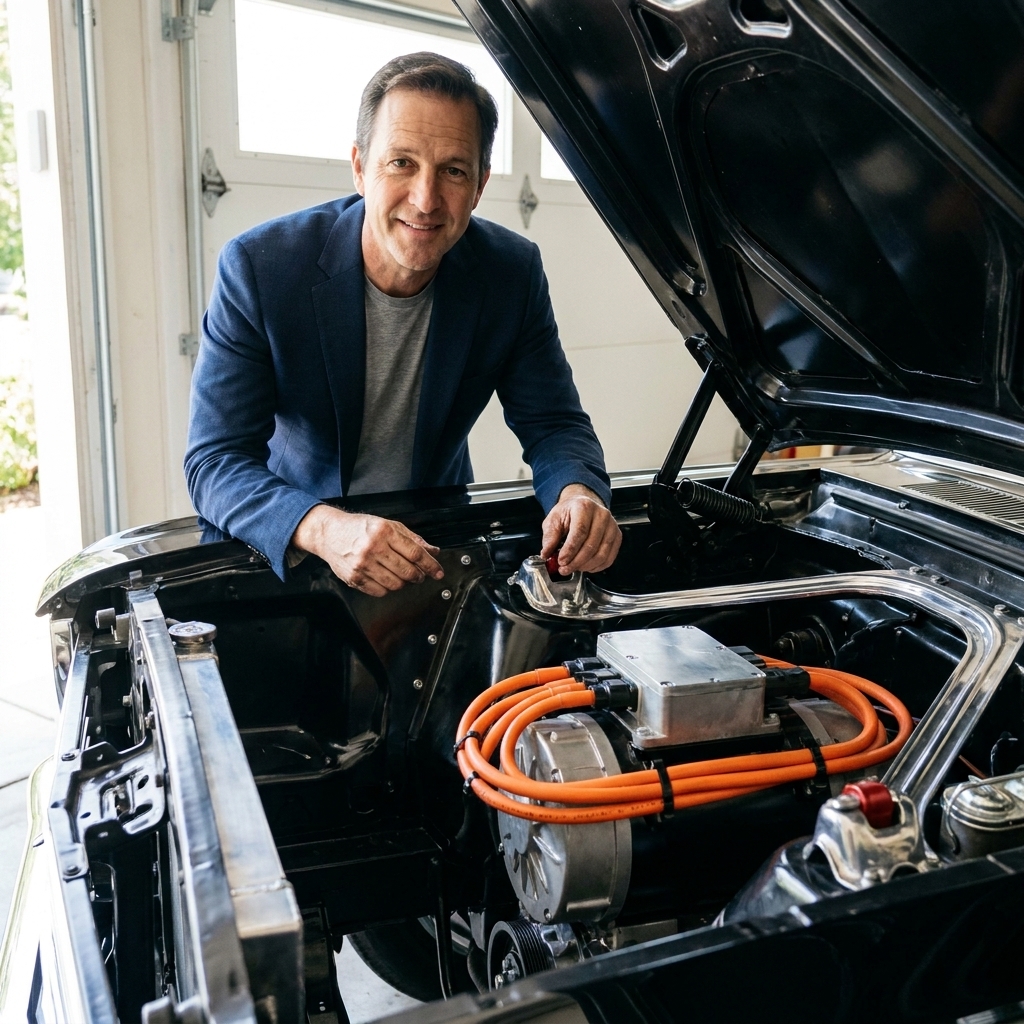
Transmission choices
This is one of the most personal decisions in any conversion.
Keeping the manual transmission
- Pros: Preserves the classic driving vibe, can simplify packaging, lets you choose gears for hills or highway.
- Cons: More moving parts, clutch wear, and you still need an adapter and careful alignment.
Direct drive (single-speed reduction)
- Pros: Simpler drivetrain, fewer parts, often quieter, and it can be more efficient when the reduction keeps the motor in a happy RPM and load range.
- Cons: May require more fabrication, half-shaft and differential considerations, and careful gear ratio planning.
For a relaxed cruiser, I often like a simple direct-drive approach. For a classic that is all about engagement, a manual can be a blast, even if you mostly leave it in one gear.
Supporting mods to plan for
Brakes
EV power does not magically demand massive brakes, but extra mass, more tire grip, and repeated stops from modern traffic speeds can. Many conversions benefit from a front disc upgrade, fresh rear hardware, and a properly matched master cylinder. If you add regenerative braking, make sure the blend feels predictable.
Suspension
New springs and dampers are common because the car’s corner weights change. You want the ride height right and the handling consistent.
Steering assist
If the car had power steering driven by a belt, you will need an electric power steering solution or a manual rack swap. There are electric-hydraulic and column-assist options depending on platform.
Cabin heat and defrost
Do not ignore defrost if you plan to drive in cool weather. A fogged windshield is a safety issue, not a comfort issue.
Regen braking realities
Regen is a great tool, but it is not a magic brake upgrade. Some conversions have strong, smooth regen. Others have limited regen because of controller limits, battery acceptance limits (especially when cold or near full), or drivetrain choices.
- Pedal feel: The best setups take time to tune so the handoff from regen to friction brakes does not feel grabby or vague.
- Brake lights: If regen can slow the car meaningfully, you need a plan for brake light signaling that matches local laws and does not surprise drivers behind you.
- Wet and low traction: Aggressive regen can upset the rear of a light car on slick roads. Keep it sane.
Instruments and controls
Old gauges do not speak CAN bus, and your new drivetrain does not care about your old tach cable. Plan this early so you do not end up with a finished car and no useful information.
- State of charge: Give yourself a reliable SOC display. Guessing range gets old fast.
- Speedometer: Options include GPS speedos, electronic conversions, or signal adapters depending on your transmission and sensor setup.
- Warnings: At minimum, you want clear indicators for HV system fault, charge status, and coolant temp if you run liquid cooling.
Noise, vibration, and driveline
EVs are quiet, which means you will hear things you never noticed before.
- Mounts: Solid mounts can transmit whine and vibration into the cabin. Too soft and you can stress shafts and couplers. Balance matters.
- Driveshaft angles: If you keep a transmission, set driveline angles correctly or you will chase vibration that feels like a haunted car.
- Differential health: Instant torque finds weak spider gears and tired bearings. Refresh it now, not after it starts howling.
Planning the build
Step 1: Define the target
- Desired range
- Acceleration goal
- Top speed and highway use
- Charging expectations (Level 1, Level 2, fast charge)
Step 2: Pick your voltage and architecture
Higher voltage can mean lower current for the same power, which can help with efficiency and cable sizing. It also raises the stakes on safety and component matching. Choose a path that fits your experience level and the support you can get.
Step 3: Package the battery early
The coolest motor in the world does not matter if your battery boxes end up hanging too low or eating your trunk and rear seat in a way you hate.
Step 4: Wiring and serviceability
Plan for fuses, disconnects, access panels, and neat routing. You will want to troubleshoot someday, even if everything goes perfectly.
Step 5: Build a safety plan
- HV interlock loop where appropriate
- Proper strain relief and grommets
- Clearly labeled disconnect and emergency procedures
- Fire safety in the garage
Charging: what to expect
Most conversions live on Level 2 charging, and that is fine. Common onboard charger sizes are 6.6 to 11 kW. In real terms, that often looks like roughly 20 to 40 miles of range per hour of charging, depending on your car’s efficiency and the charger power you actually have available.
DC fast charging is doable in some builds, but it usually requires OEM-style control of contactors and pack sensing, plus standards compliance for CCS or CHAdeMO. That is why many aftermarket conversions skip DC fast charging and focus on a robust, predictable Level 2 setup.
Legal, registration, and insurance
Rules vary by state and country, so you will want to check your local DMV and inspection requirements early. Some jurisdictions have clear EV conversion guidelines. Others have none, which can be its own kind of paperwork adventure. Common themes:
- Title and fuel type update: Some jurisdictions require reclassification.
- Emissions: Many areas exempt older classics already, but you may still need inspection paperwork.
- Insurance: Agreed-value classic policies can work well, but disclose the conversion and keep receipts and photos.
- Safety inspection: Lighting, brakes, and general roadworthiness still apply, and some inspectors look for HV labeling and an accessible disconnect.
If you pay a shop, ask whether they provide documentation for inspection. It saves headaches later.
Common pitfalls
Underestimating wiring complexity
High-voltage wiring is not the place for guesswork. Use properly rated cable, connectors, and fusing. Keep runs protected, secured, and away from sharp edges and heat.
Buying incompatible components
Motor, inverter, BMS, charger, and DC-DC all need to play nice together. If you are mixing and matching, confirm compatibility from people who have made that exact combination work.
Ignoring thermal management
A car that feels great for 10 minutes but derates power or overheats in traffic is a frustration machine. If your components are liquid-cooled, treat the cooling loop like a real system, not an afterthought.
Skipping brakes and tires
Instant torque exposes weak tires and tired suspension bushings. Budget for rubber and friction parts.
Sample build anchor
Readers always ask for one tangible reference point. Here is a representative street build that balances cost, range, and drivability. Treat it like a starting template, not a universal recipe.
- Motor and inverter: 100 to 200 kW capable package (aftermarket AC system or OEM drive unit with a proven controller)
- Battery: 30 kWh pack, 300 to 400V class, with a proper BMS
- Charging: 6.6 to 11 kW onboard charger, J1772 inlet
- 12V: 1 to 2 kW DC-DC converter
- Safety: Main fuse, contactors, pre-charge, service disconnect, HV rated cabling and connectors
Example budget breakdowns
Budget-friendly cruiser (roughly $20,000 to $30,000 DIY)
- Moderate power motor and controller
- Battery sized for 60 to 100 miles
- Level 2 charging capability
- Basic cabin heat
- Brake refresh and decent tires
Premium restomod (roughly $70,000 to $140,000 turnkey)
- High power drive unit with refined tuning
- Larger liquid-cooled battery pack
- High-capacity onboard charger and polished charge port integration
- Modern HVAC solution
- Suspension, brakes, sound deadening, and interior updates
FAQ
How long does an EV conversion take?
A focused DIY builder can take several months of weekends. A first-timer learning as they go can take a year or more. A professional shop timeline often ranges from a few months to over a year depending on backlog and build scope.
Do EV conversions hurt classic car value?
It depends on the car and the buyer. Rare, numbers-matching collectibles often command higher value staying original. More common classics and restomod-friendly platforms can gain value if the conversion is clean, well-documented, and professionally executed. Keep every removed part if originality matters to you.
Can I fast charge a converted classic?
Sometimes, but it is not automatic. DC fast charging usually requires OEM-style contactor control, pack-level sensing, and standards compliance (CCS or CHAdeMO). Many conversions stick to Level 2 charging for simplicity and reliability.
Is it safe to work on high voltage at home?
It can be, but you need the right training mindset: proper PPE, insulated tools, lockout procedures, and respect for the fact that EV pack voltage can be lethal. If you are not comfortable, partner with a qualified shop for the high-voltage portions.
What is the simplest classic to convert?
Generally, lighter rear-wheel-drive cars with generous engine bays and straightforward drivetrains are easiest. Classic small trucks can also be very conversion-friendly because of packaging room.
My parting advice
Pick a conversion path that matches your goal and your tolerance for fabrication and troubleshooting. Spend extra time on battery packaging and safety. And do not feel pressured to chase huge range numbers if your classic is really meant to be a local legend.
If you do it right, you end up with something special: a car that still turns heads like it did in 1978, but pulls away from the light with a smooth, quiet shove that never gets old.